Sending faxes directly from your company email is a quick and easy way to send documents without the need for a physical fax machine. This guide will walk you through the one-time setup and the simple steps to send a fax.
If you’ve already completed the One-Time Setup, feel free to skip ahead to the 'Send a Fax via Email' section.
Table of Contents:
Before proceeding with the steps below, please verify whether you're already an authorized fax user. If you're unsure or need access, contact Caldera IT for assistance.One-Time Setup:
To ensure proper functionality for sending faxes via email, you'll need to complete a quick, one-time setup in your Outlook settings.
Step 1:
Click on "Settings." Look for the gear icon in the top right corner of your Outlook interface.

Step 2:
Click on 'Mail.' In the settings menu on the left, go to the 'Compose & Reply' section and select 'Always show From.' Then, click 'Save' at the bottom of the window.

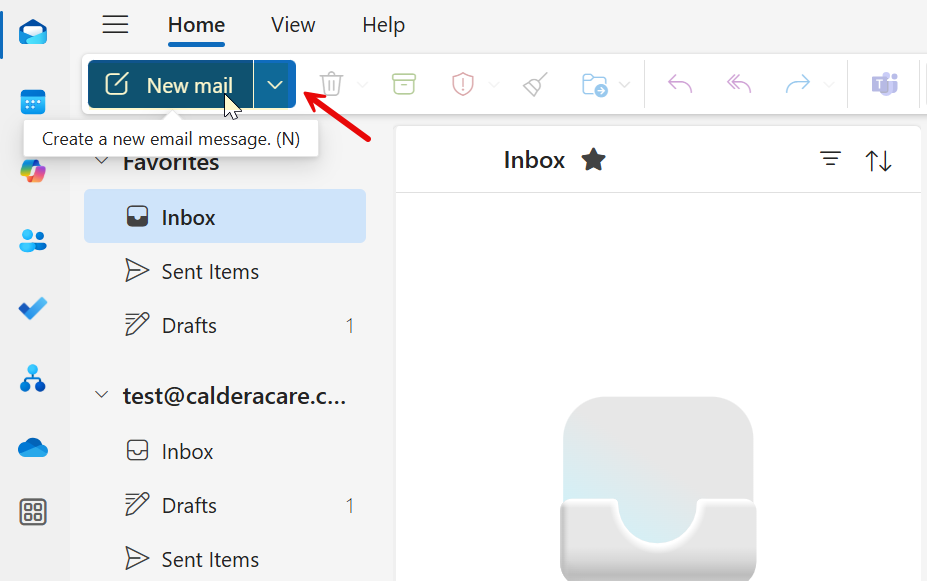
Step 3:
Click the “New mail” button

Step 4:
Click the "From" field, then select "Other email address."

Step 5:
Enter the facility’s master eFax email (e.g., efax@[facilitydomain.com]).
> Example: If you’re with Three Rivers Care, enter efax@threerivers.care.

One-time setup complete! You're all set to start sending faxes. ⬇️
Send a Fax Via Email
Sending a fax via email is quick and easy! Just follow these 5 simple steps to get started.
Step 1:
Click the "New mail" button in the upper left corner of your Outlook interface.
Step 2:
In the "From" field, choose efax@{Facility Domain}.com.
> Example: If you’re with Three Rivers Care, select efax@threerivers.care.
**It's crucial to send faxes from the facility dedicated eFax address for successful transmission.**
Step 3: In the "To" field, enter the fax number like this: ‘phone-number@fax.maxsip.com’
> Example: To fax (253) 251-9003, enter: 12532519003@fax.maxsip.com
Step 4: Attach the documents you’d like to fax.
Click the paperclip icon (attachment icon) to browse and select the document you wish to fax. Supported file types include Word (.doc, .docx), Excel (.xls, .xlsx), PDF, and Image files (TIFF format works best)
Step 5: Send the email.
Once your document is attached and the "From" and "To" fields are correctly filled, click the "Send" button.

What Happens Next
After sending your email fax, please note that status updates may take a few minutes to arrive in your inbox. This is completely normal, as each fax takes a bit of time to process.
Fax "On the Way" Notification: You will first receive an email with the subject: "Your fax is on the way!". This confirms that the fax system has received your request.
Fax Delivery Confirmation: If the fax is successfully delivered to the recipient, you'll receive another email with the subject: "Fax delivered to [fax number]".

Troubleshooting & FAQs
- My document isn't a supported file type. Please convert your document to one of the supported formats (Word, Excel, PDF, TIFF image) before attempting to send the fax.
- I didn't receive an "on the way" email. Double-check that you sent the email from the correct eFax address (e.g., efax@yourfacility.com). If the issue persists, contact IT support.
- My fax failed to deliver. Common reasons for delivery failure include an incorrect fax number, the recipient's fax machine being busy, or a problem with the file format. Review the fax number entered and ensure it's accurate.
Video Guide
Was this article helpful?
That’s Great!
Thank you for your feedback
Sorry! We couldn't be helpful
Thank you for your feedback
Feedback sent
We appreciate your effort and will try to fix the article