This guide provides step-by-step instructions for adding a facility printer on a Windows computer using the built-in Windows printer settings.
Table of Contents:
?️ Add a Printer in Windows
Follow the steps below to connect your computer to the facility's main printer.
Steps:
Open Settings from the Windows Start menu.
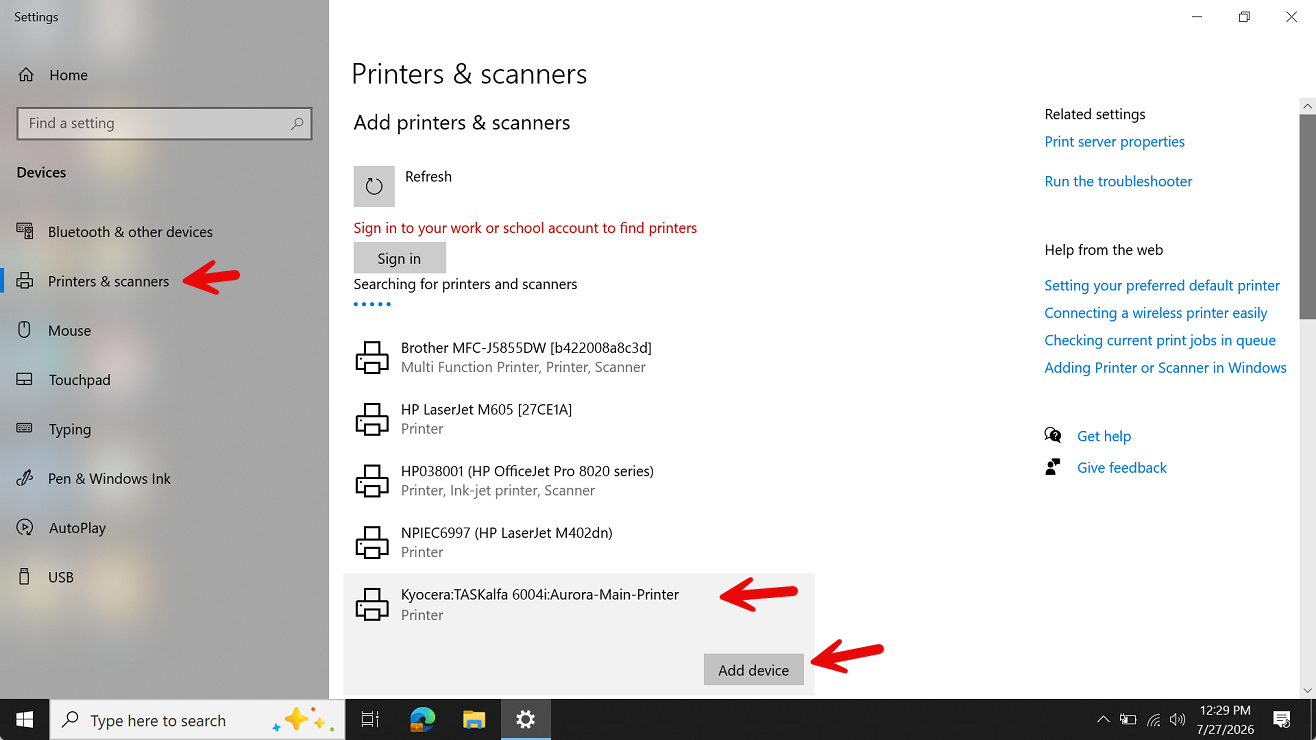
Select Bluetooth & devices, then choose Printers & scanners.
Click Add device.
Allow Windows to search for available printers.
Select the facility's main printer from the available list.
Click Add device and wait for Windows to complete the installation.
Screenshot:
Troubleshooting
If the printer does not appear, confirm you are connected to the facility main network (CC-WiFi) and try searching again.
If you are still unable to add the printer, please submit a ticket through the Caldera Support Portal.
Was this article helpful?
That’s Great!
Thank you for your feedback
Sorry! We couldn't be helpful
Thank you for your feedback
Feedback sent
We appreciate your effort and will try to fix the article